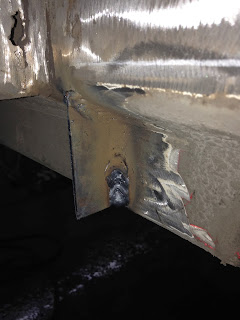
Here I have removed the old broken tipper and prepared the area to install the newer tipper. I have ground away all of the slag from the tourch and the paint, so I can get a good weld on the updated tipper.
This is one of the gussets that I have fabricated to install on the tailgate because the tipper that I am installing on this unit will be hanging low on the tailgate in order for it to operate correctly.
If you notice that I have angled one edge, this is to make room for the weld and to get a good strong weld to hold the gusset to the tailgate. on the other side I have cut it at one sharp angle, because once the tipper is in place I will not be able to get behind it to weld. So with this being at this angle the weld will start from the inside of the gusset and be worked out outward with multiple passes.
These are the gussets installed on the tailgate that will help hold the tipper in place.
Here the tipper is welded to the tailgate.
Here is the installed tipper, but as you can see when it comes up in the dump position it hits the load edge. In this case I will have to trim the load edge so that this tipper will work correctly.
This is the tipper installed and ready to run.
This is the tipper in operation.


No comments:
Post a Comment